
만족
[React] 간단한 Cypress E2E 테스트 적용해보기 본문
[React] 간단한 Cypress E2E 테스트 적용해보기
FrontEnd/React Satisfaction 2023. 10. 3. 23:03웹 배포 후 정상적으로 작동하는지 확인해보기 위해 직접 몇몇 url들로 들어가, 정상적으로 웹사이트가 동작하는지 확인하고는 한다.
그러나 매 배포마다 모든 페이지를 확인하기는 번거로우며,
그렇다고 테스트 코드를 빡빡하게 작성하기에는 부담스럽다.
cypress를 사용하면 이 작업을 간단히 자동화할 수 있다.
가령 특정 url로 접근하기만 해도 웹사이트가 터져버리는데 미처 확인하지 못해 한참 뒤에나 알아차린 경험이 있다면
아주 간단한 cypress test를 적용하는 것 만으로도 그런 상황을 막을 수 있을 것이다.
샘플 프로젝트 세팅
# 리액트 프로젝트 생성
npx create-react-app simple-cypress-with-react
cra로 리액트 프로젝트를 생성해준다.
yarn add react-router-dom라우팅을 위해 react-router-dom을 설치해준다.
// App.js

import { BrowserRouter, Route, Routes } from "react-router-dom";
import Hello from "./pages/hello";
import Home from "./pages/home";
import ErrorBoundary from "./ErrorBoundary";

function App() {
  return (
    <ErrorBoundary>
      <BrowserRouter>
        <Routes>
          <Route path="/" element={<Home />}></Route>
          <Route path="/hello" element={<Hello />}></Route>
        </Routes>
      </BrowserRouter>
    </ErrorBoundary>
  );
}

export default App;
// ErrorBoundary.js
import React from "react";
export default class ErrorBoundary extends React.Component {
constructor(props) {
super(props);
this.state = { hasError: false };
}
static getDerivedStateFromError(error) {
// 다음 렌더링에서 폴백 UI가 보이도록 상태를 업데이트 합니다.
return { hasError: true };
}
componentDidCatch(error, errorInfo) {
// 에러 리포팅 서비스에 에러를 기록할 수도 있습니다.
}
render() {
if (this.state.hasError) {
// 폴백 UI를 커스텀하여 렌더링할 수 있습니다.
return <h1 id="error-boundary">Something went wrong.</h1>;
}
return this.props.children;
}
}// pages/hello.js
import React from "react";
const Hello = () => {
return <div>Hello~</div>;
};
export default Hello;// pages/home.js
import React from "react";
const Home = () => {
return <div>Home page</div>;
};
export default Home;
간단히 /, /hello 에 해당하는 페이지를 생성해주자.
이제 /로 접속하면 'Home page' 가 표시되고, /hello로 접속하면 'Hello~' 가 표시될 것이다.
만약 app.js(home.js, hello.js 포함)에서 exception이 발생한다면
ErrorBoundary에 의해 'Something went wrong' 이 표시될 것이다.
Cypress를 이용해 이 페이지(url)들을 한번씩 방문하면서 오류가 발생하는지 자동으로 테스트해보자.
Cypress 설치하기
yarn add --dev cypressdevDependency로 cypress를 설치한다.
//package.json
{
  ...
  "scripts": {
    "start": "react-scripts start",
    "build": "react-scripts build",
    "test": "react-scripts test",
    "eject": "react-scripts eject",
    "cy:open": "cypress open"
  },
  ...
}
package.json의 scripts에서 "cy:open": "cypress open"을 추가해 준다.
이제 yarn cy:open을 통해 cypress panel을 열 것이다.
yarn cy:opencypress panel을 열어보자.

이런 화면이 나타날 것인데, 우리는 E2E Testing을 선택해 세팅해보자.

continue 를 누르자

크롬을 선택하고 Start E2E Testing in Chrome 을 눌러주자.

그럼 크롬 창이 하나 뜰 것이다.
여기서 Create new spec으로 새로운 E2E 테스트 파일을 만들 것이다.

단순히 url에 방문하고, 오류가 나는지만 검사할 것이므로 url-traverse.cy.js로 이름을 지을 것이다.
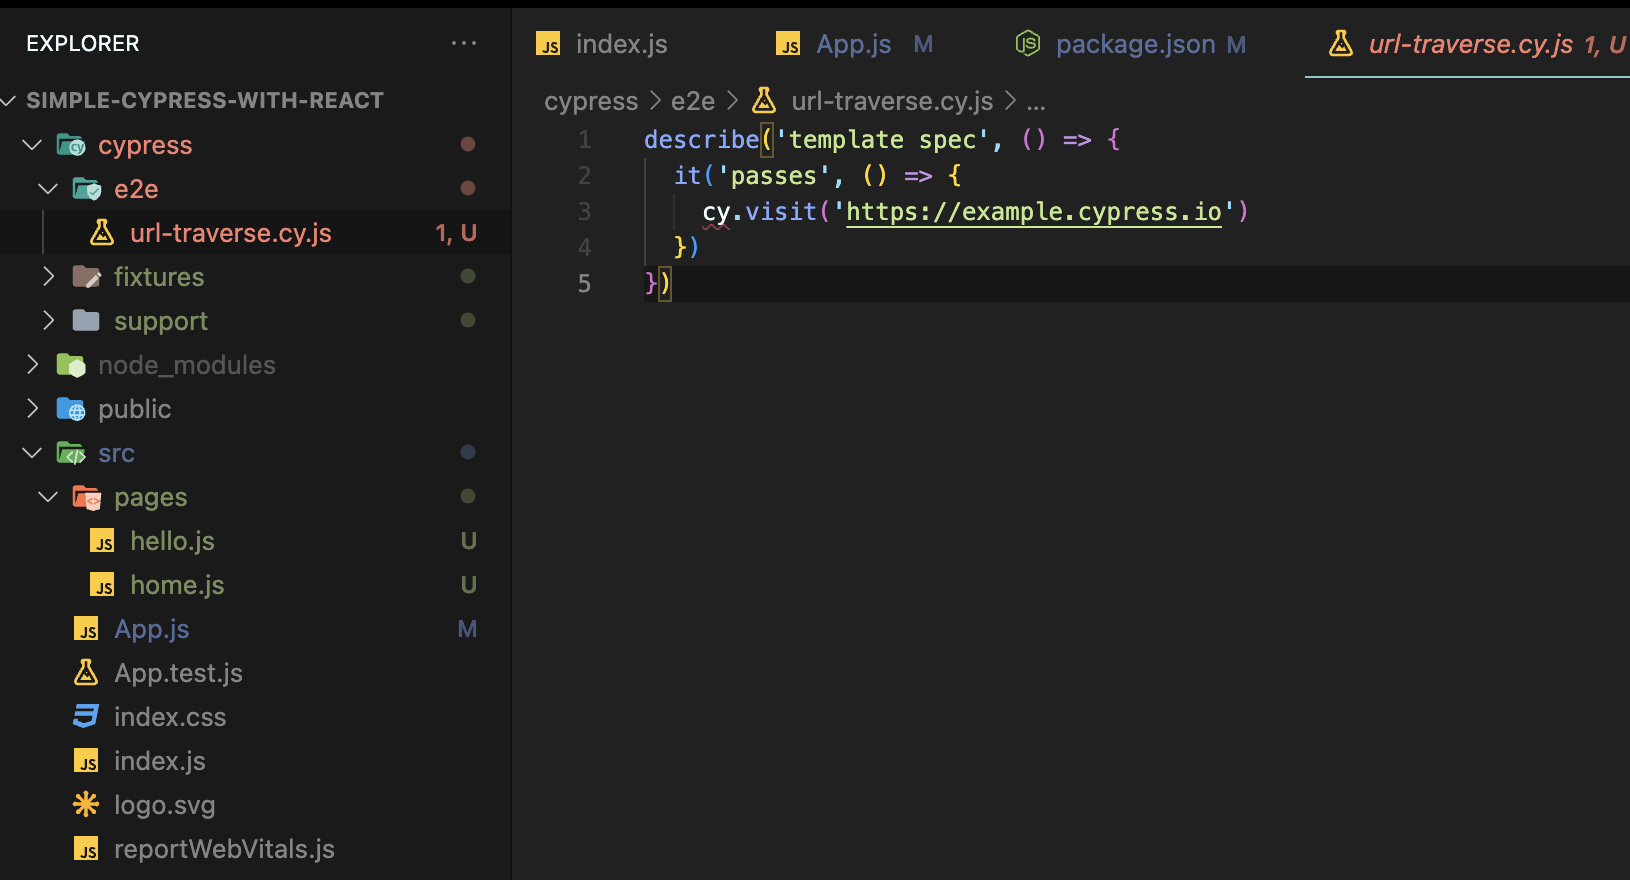
프로젝트에 cypress 폴더가 생겼다.
Lint Error
eslint를 사용한다면 cy.js 파일에서 빨간줄이 표시될 것이다.
yarn add --dev eslint-plugin-cypresscypress eslint plugin을 설치해주고,
cypress 폴더에 .eslintrc 파일을 생성한다.

{
  "plugins": ["cypress"],
  "extends": ["plugin:cypress/recommended"]
}
.eslintrc 파일에 위 내용을 입력하면 더 이상 린트에러는 발생하지 않는다.
간단한 e2e 테스트 코드 작성
cypress/e2e/url-traverse.cy.js 파일을 열고 내용을 아래처럼 바꾼다.
//검사할 url 리스트
const urls = ["/", "/hello"];

describe("url traverse", () => {
  urls.forEach((url) => {
    it(url, () => {
      cy.visit(url);

      //리액트 컴포넌트가 마운트될때까지 대기
      cy.get("#root").should("not.be.empty");

      //error-boundary가 렌더링되었다면 exception이 발생한 것이다
      cy.get("#error-boundary", { timeout: 0 }).should("not.exist");
    });
  });
});
이제 cypress가 urls를 돌면서 테스트를 수행할 것이다.
ErrorBoundary가 렌더링되지 않았다면, unhandled exception은 없다는 것이 된다.
아직 테스트는 정상적으로 진행되지 않는다.
urls에서 baseUrl을 생략했으므로, baseUrl을 설정해 주어야 한다.
//cypress.config.js

const { defineConfig } = require("cypress");

module.exports = defineConfig({
  e2e: {
    setupNodeEvents(on, config) {
      // implement node event listeners here
    },
    baseUrl: "http://localhost:3000",
  },
});
baseUrl을 설정하지 않아도 상관은 없지만, 그렇게 되면 urls에서 계속해서 baseUrl을 넣어줘야만 한다.
이제 개발용 서버를 시작해 보자.
yarn start
테스팅 준비가 끝났다.
다시 cypress panel로 돌아가보면

이런식으로 테스트를 모두 통과한 것을 확인할 수 있다.
exception이 발생하면 정말로 테스트도 실패하는지 확인해 보자.
// pages/home.js

import React from "react";

const Home = () => {
  const empty = null;
  empty.foo();

  return <div>Home page</div>;
};

export default Home;
일부러 오류가 발생하는 코드를 집어넣고, 테스트를 재시작하면

의도대로 테스트에 실패하는 것을 확인할 수 있다.
만약 개발용 서버가 아닌, 빌드 결과물에 대해 실행하고 싶다면
yarn add serveserve 모듈을 설치하고
package.json에 build-and-deploy 스크립트를 추가한다.
{
  ...
  "scripts": {
    "start": "react-scripts start",
    "build": "react-scripts build",
    "test": "react-scripts test",
    "eject": "react-scripts eject",
    "cy:open": "cypress open",
    "build-and-deploy": "yarn build && serve -s build"
  },
  ...
}
이제 yarn build-and-deploy를 실행한 다음, cypress test를 실행하면 실제 빌드 결과물로 테스트해볼 수 있다.
페이지 로딩 대기
실제 프로덕션에서는 페이지가 렌더링된 후
useEffect 에서 api fetch로 받아온 데이터로 추가 컴포넌트는 그리는 경우도 많다.
// home.js

import React, { useEffect, useState } from "react";

const Home = () => {
  const [data, setData] = useState(null);

  useEffect(() => {
    //dummy api test
    fetch("https://dummyjson.com/products")
      .then((res) => res.json())
      .then((json) => setData(json.products));
  }, []);

  return (
    <div>
      Home page
      <div>
        {data?.map((d) => {
          return <div key={d.id}>{d.title}</div>;
        })}
      </div>
    </div>
  );
};

export default Home;
이런 경우 위 테스트코드를 그대로 사용한다면, api fetch가 완료되기 전 상태만 검사되어
응답이 온 후 그려지는 컴포넌트에 대해서는 검사되지 않는다.
예를 들어 응답 데이터로 그려내는 부분에 다음과 같이 에러를 유발시키면
import React, { useEffect, useState } from "react";

const Home = () => {
  const [data, setData] = useState(null);

  useEffect(() => {
    //dummy api test
    fetch("https://dummyjson.com/products")
      .then((res) => res.json())
      .then((json) => setData(json.products));
  }, []);

  return (
    <div>
      Home page
      <div>
        {data?.map((d) => {
          throw "error!!";
          return <div key={d.id}>{d.title}</div>;
        })}
      </div>
    </div>
  );
};

export default Home;
cypress에서는 테스트가 통과되었다고 표시되기 때문에 문제가 있다.
// url-traverse.cy.js

//검사할 url 리스트
const urls = ["/", "/hello"];

describe("url traverse", () => {
  urls.forEach((url) => {
    it(url, () => {
      cy.visit(url);

      //리액트 컴포넌트가 마운트될때까지 대기
      cy.get("#root").should("not.be.empty");

      //1초간 대기
      cy.wait(1000);

      //error-boundary가 렌더링되었다면 exception이 발생한 것이다
      cy.get("#error-boundary", { timeout: 0 }).should("not.exist");
    });
  });
});
cy.wait() 를 이용해 일정 시간동안 대기하도록 하면 어떨까?

정상적으로 "실패"가 뜨긴 하지만,
만약 api가 일시적으로 느리게 동작한다면 어떨까?
단순히 wait값을 늘릴 수 있겠지만,
그렇게 되면 urls 갯수가 많아졌을 때 테스트 실행시간이 너무 오래 걸릴 것이다.
// utils/install-xhr-intercept.js

const origin_xhrOpen = window.XMLHttpRequest.prototype.open;

window.fetch_count = 0;

window.XMLHttpRequest.prototype.open = function () {
  // do something with the method, url and etc.
  window.fetch_count++;
  const onResponse = function () {
    // do something with the response text
    window.fetch_count--;
    this.removeEventListener("load", onResponse);
  };
  this.addEventListener("load", onResponse);

  return origin_xhrOpen.apply(this, arguments);
};

const origin_fetch = window.fetch;
window.fetch = async (...args) => {
  window.fetch_count++;
  return origin_fetch(...args).finally(() => {
    window.fetch_count--;
  });
};
이 코드는 XMLHttpRequest와 fetch를 사용할 때,
요청이 시작되면 fetch_count를 1 증가시키고,
요청이 완료되면(실패든 성공이든) fetch_count를 1 감소시킨다.
// app.js

import "./utils/install-xhr-intercept";

import { BrowserRouter, Route, Routes } from "react-router-dom";
import Hello from "./pages/hello";
import Home from "./pages/home";
import ErrorBoundary from "./ErrorBoundary";

function App() {
  return (
    <ErrorBoundary>
      <BrowserRouter>
        <Routes>
          <Route path="/" element={<Home />}></Route>
          <Route path="/hello" element={<Hello />}></Route>
        </Routes>
      </BrowserRouter>
    </ErrorBoundary>
  );
}

export default App;
app.js의 최상단에 import './utils/install-xhr-intercept' 를 입력하여 인터셉터를 설치한다.
이제 cypress쪽에서 이를 대기할 수 있도록 해보자.
테스트를 fetch_count가 0이 될때까지 기다렸다가 error-boundary가 있는지 검사하도록 테스트 코드를 변경할 것이다.
// cypress/support/command.js

Cypress.Commands.add("waitUntilNetworkIdle", (timeout = 10 * 1000) => {
  cy.window().then(
    {
      timeout,
    },
    (window) =>
      new Cypress.Promise((rs) => {
        const waitUntilNetworkIdle = (onNetworkIdle) => {
          if (window.fetch_count > 0) {
            setTimeout(() => {
              window.requestIdleCallback(() =>
                waitUntilNetworkIdle(onNetworkIdle)
              );
            }, 100);
          } else {
            window.requestIdleCallback(() => {
              onNetworkIdle();
            });
          }
        };
        waitUntilNetworkIdle(rs);
      })
  );
});
cypress/support/command.js 에 위 코드를 추가한다.
cypress에서는 임의의 커맨드를 추가할 수 있다.
이렇게 하면 cypress test에서 cy.waitUntilNetworkIdle(); 처럼 사용할 수 있다.
다시 url-traverse.cy.js로 돌아와서 cy.wait() 대신 cy.waitUntilNetworkIdle() 을 사용해보자.
//검사할 url 리스트
const urls = ["/", "/hello"];

describe("url traverse", () => {
  urls.forEach((url) => {
    it(url, () => {
      cy.visit(url);

      //리액트 컴포넌트가 마운트될때까지 대기
      cy.get("#root").should("not.be.empty");

      //네트워크 요청 갯수가 0이 될 때까지 대기
      cy.waitUntilNetworkIdle();

      //error-boundary가 렌더링되었다면 exception이 발생한 것이다
      cy.get("#error-boundary", { timeout: 0 }).should("not.exist");
    });
  });
});
테스트를 실행시켜 보면

정상적으로 모든 응답이 처리될 때 까지 기다렸다가 테스트 코드를 마저 실행시킬 수 있다.
물론 여기에서는 단순 fetch, xhrRequest만 다뤘다.
만약 socket이나 다른 형태의 데이터 로딩, 작업을 대기해야 한다면 추가 작업이 필요할 것이다.
command line에서만 테스트 실행
직접 빌드하고, 빌드 결과물을 서빙하는 포트를 열고, cypress 패널을 열어 테스트를 실행시키고...
이런 과정은 지루하다.
커맨드라인에서 한 줄 실행으로 테스트를 실행해볼 수는 없을까?
물론 가능하다.
yarn add --dev start-server-and-test자동으로 서버를 시작하고, 이후 cypress test를 실행하기 위해 start-server-and-test 모듈을 설치한다.
그리고 package.json에서 scripts에 cy:run, cy:test 를 추가한다.
{
  ...
  "scripts": {
    "start": "react-scripts start",
    "build": "react-scripts build",
    "test": "react-scripts test",
    "eject": "react-scripts eject",
    "cy:open": "cypress open",
    "build-and-deploy": "yarn build && serve -s build",
    "cy:run": "yarn cypress run",
    "cy:test": "start-server-and-test start http://localhost:3000 cy:run"
  },
  ...
}
만약 실제 빌드 결과물에 대해 테스트를 실행하고 싶다면
"cy:test": "start-server-and-test start http://localhost:3000 cy:run"를
"cy:test": "start-server-and-test build-and-deploy http://localhost:3000 cy:run" 로 바꿔주면 된다.
이제 yarn cy:test 를 실행해보면

다음과 같이 테스트가 진행된다.
이 스크립트를 배포 스크립트나, git hooks에 추가하여
굳이 직접 테스트 스크립트를 돌리지 않더라도 필요한 순간에 자동으로 검사하도록 할 수도 있다.
이 내용은 아래 포스트를 참고하면 된다.
https://satisfactoryplace.tistory.com/361
[React] github action을 이용한 자동 배포 환경 구성
https://satisfactoryplace.tistory.com/106 [React] scp명령어를 이용한 배포 간소화 현재까지 배포 과정은 다음과 같았다. 1. yarn build 입력 후 빌드 대기 2. FTP클라이언트를 켠 후, build폴더 내용을 원격 서버에
satisfactoryplace.tistory.com
https://satisfactoryplace.tistory.com/367
[Nodejs] husky 를 이용한 Githook 추가
지난 포스트에서 jest, eslint를 적용해봤다. 그렇다면 이 스크립트를 커밋 전 실행해서 안전한 코드일때만 허가할 수는 없을까? https://www.npmjs.com/package/husky husky Modern native Git hooks made easy. Latest versi
satisfactoryplace.tistory.com
마무리
뭔가 포스트는 엄청 긴데, 따라해보면 사실 별게 없다.
간단히 세팅 가능하면서도 대참사를 미리 방지할 수 있는 도구이기 때문에 꼭 사용해보는 것을 추천한다.
사용된 예제 코드는 아래에 올려 두었다.
https://github.com/NamGungGeon/simple-cypress-with-react
GitHub - NamGungGeon/simple-cypress-with-react
Contribute to NamGungGeon/simple-cypress-with-react development by creating an account on GitHub.
github.com
'FrontEnd > React' 카테고리의 다른 글
| [React] Tanstack Query(react-query) 훑어보기 (0) | 2024.02.12 |
|---|---|
| [React] Rendered more hooks than during the previous render (0) | 2023.01.22 |
| [React] 리액트 프로젝트 캐시 전략 (0) | 2022.12.18 |
| [React] react-simple-wysiwyg 빌드 오류 (0) | 2022.09.12 |
| [React] redux에서 swr로 옮긴 썰 (2) | 2022.09.10 |


